Users

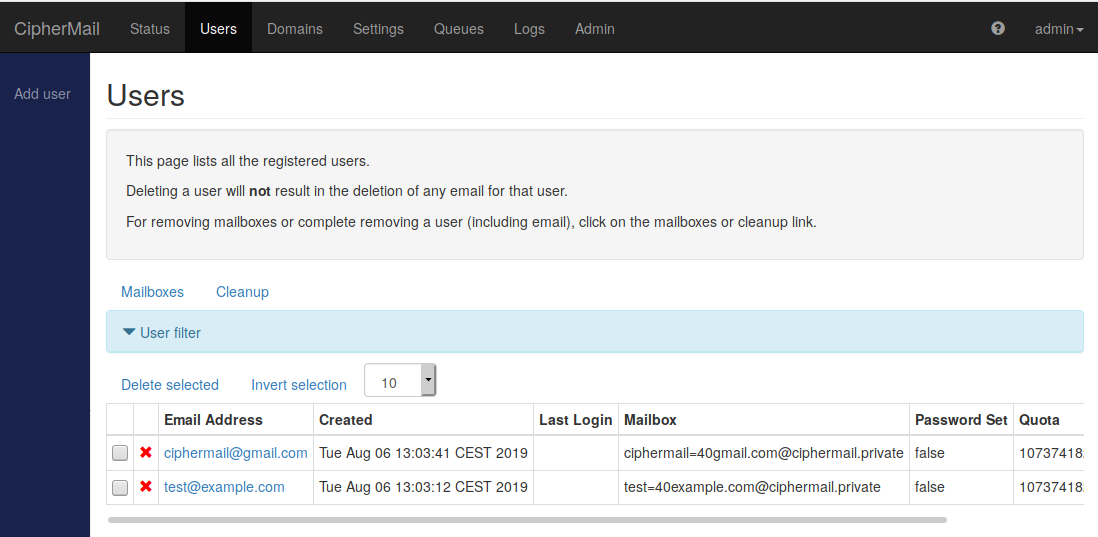
The users page shows all users for which there is a mailbox. Webmail Messenger will automatically add a new user object the first time an email is sent to the user.

A user can be deleted by clicking the “red cross” icon or by selecting the user and then clicking Delete selected

Note

Deleting a user object does not result in the removal of the users mailbox. After a re-sign up, the user has access to all old emails. To completely delete all email for a user, remove the complete mailbox.

Users

Mailbox

Email for a user is stored in the users mailbox. The available mailboxes can be listed and managed by clicking Mailboxes on the “Users” page. On the “Mailboxes” page, the available mailboxes will be shown. The following mailbox details will be listed: “Disk usage”, “Email”, “Mailbox”

Note

Only 10 mailboxes will be shown at the same time. Use the mailbox filter to search for specific mailboxes.

Disk usage

The total disk size of the mailbox. The total size of the mailbox is limited by the quota for the user.

Email

The email address associated with the mailbox.

Mailbox

The directory where the mailbox is stored (as a sub directory of /var/vmail/).

Note

Deleting a mailbox only deletes the email of that user. The login account is however not removed.

Mailbox filter

The mailbox filter can be used to search for specfic mailboxes.

Hide active mailboxes

If “Hide active mailboxes” is set, only mailboxes will be shown for which the password is set. This can be used to remove mailboxes for users which never logged in.

User cleanup

For every Webmail Messenger user, a user object and mailbox is created. Email for a Webmail Messenger user is stored on the file system. To make sure that Webmail Messenger does not run out of disk space, it’s advised to periodically remove user accounts and mailboxes of users who haven’t logged in for a long time.

On the “User cleanup” page, users who have never logged or for which the last login has been some time ago can be deleted. Filtered users can be deleted by selecting the user and clicking “delete” selected.

Tip

The “User cleanup” page can be used to remove users and the associated inboxes. It is possible to configure Webmail Messenger to periodically delete old email for a user. This helps to prevent running out of disk space. See Auto cleanup for more information.

Created

This field can be used to only show users which were created within a certain date range.

Last login

This field can be used to only show users for which the “last login” field is set within a certain date range.

Last login should not be set

If set, only users will be shown who never logged in.

Password should not be set

If set, only users will be shown for which no password was set.

Domains

If an inherited setting should be explicitly set or modified for a domain, a domain object should be created. In most setups, there is no reason to add a domain.

Settings

Location

The name of the sub-directory, under /var/vmail/, where the email for the user is stored.

Disk usage

The total disk size in bytes of the user mailbox.

Quota

The current disk quota for the user.

Created

The date the user object was created.

Last login

The last login date of the user. Set to never if the user never logged in.

Password is set

If visible, a password is set for the user. The administrator can change the user password by clicking Change password.

Password is not set

If visible, a password is not yet set for the user. The administrator can set the user password by clicking Set password.

General

Comment

The comment field is a free form field which can be used to add comments for the settings. For example some brief explanation why certain settings have been changed for a domain.

Default portal login action

The “Default portal login action” determines which page is opened after the user logged in. The following options can be selected: Portal, Webmail (the default).

Use notification sender

If set, the initial sign-up email and the “new email” notification messages will be sent using the configured “Notification sender” as the sender, i.e., the “from” header and the envelope sender will be set to the email address configured under “Notification sender”.

If “Use notification sender” is set, the envelope sender is changed to the email address configured under “Notification sender” and the from header is rewritten to:

"in name of [email protected]" <notification@ciphermail.com>

where test@example.com is the original sender address and notification@ciphermail.com is the address configured under “Notification sender”.

If “Use notification sender” is not set, the initial sign-up email and the “new email” notifications from header and envelope sender address will be set to the same value as the original email.

Login allowed

If selected, the user is allowed to login. This can be used to temporarily disallow a user to login without having to remove the user account.

Relay recipient

This is the email recipient address to which the tunnelled S/MIME message will be sent from the CipherMail gateway. “Relay recipient” must match the “Webmail recipient” setting configured on the CipherMail gateway. It is advised to use the value configured by the initial setup wizard.

Portal base URL

The base URL for the user sign-up and password reset pages. This should normally be set to the fully qualified domain name (or IP address) of the server.

Example:

https://webmail.ciphermail.com

Notification sender

If “Use notification sender” is enabled, the from and envelop sender of the sign-up email and “new email” notifiction emails will be set to the value configured under “Notification sender”.

Webmail error recipient

If an email cannot be handled by the gateway, for example the email from the gateway is not correctly signed, a notification email to the “Webmail error recipient” will be sent.

Portal password policy

The portal password policy, defines the minimal requirements for a password selected by the end-user.

Note

The password policy is only enforced when the end-user configures the portal password, not when the administrator sets the portal password for a user.

The portal password policy should be configured as a JSON string using the following syntax:

{m: INT, r:[{p:REGEX}, {p:REGEX}, .... ]}

INT is a positive integer > 0 and REGEX is a regular expression.

m is the minimal number of patterns that should match for the password to be valid and r is a list of password rules (regular expressions). If m is not specified, the default value 1 will be used.

The password validator works as follows:

A password is matched against every rule (the regular expression) and if the number of matches is greater or equal to the minimal number of matches (as defined by the m parameter), the password is accepted.

Example regular expressions

The following regular expression will match if the password contains at least 8 characters:

.{8,}

The following regular expression will match if the password contains at least one lowercase character:

[a-z]

The following regular expression will match if the password contains at least one uppercase character:

[A-Z]

The following regular expression will match if the password contains at least one digit:

[0-9]

The following regular expression will match if the password contains at least one special character from the list @#$%^&+=

[@#$%^&+=]

The above examples can be combined to form more complex rules

Example policy rules

The following password policy will check whether the password is at least 8 characters long:

{r:[{p:'^.{8,}$'}]}

Note

^ and $ are strictly speaking not needed for the above regular expression.

The following password policy will check whether the password is at least 8 characters long, contains at least one lowercase character, at least one uppercase character and at least one digit:

{m:4, r:[{p:'.{8,}'}, {p:'[a-z]'}, {p:'[A-Z]'}, {p:'[0-9]'}]}

N out of M policy*

In the above example, the minimal patterns to match (the m parameter) was equal to the number of patterns. This means that every pattern should match before the password is accepted.

The minimal patterns to match can be set to a lower value if you want to have a policy which says that the password is accepted if at least N patterns match out of the possible M patterns.

Warning

if the minimal patterns to match (the m parameter) is set to a lower value than the number of possible patterns, make sure that every pattern at least defines minimal number of characters otherwise a short password might be accepted because the N out M rule might skip the minimal length pattern. For example the following rule is unsafe {m:1, r:[{p:'.{8,}'}, {p:'[a-z]'}]} because the password is accepted if only one pattern matches and therefore a single character lowercase password will match. Whem m is less than the number of patterns, at least specify the minimal length for every rule.

Example N our of M policy rules

The following password policy will check whether the password is at least 8 characters long or is 6 characters long and contains at least a special character from the list:

{m:1, r:[{p:'.{8,}'}, {p:'(?=.*[@#$%^&+=]).{6,}'}]}

Portal password policy URL

If configured, a link to the configured page will be added to the page on which the end-user can set the portal password. The URL should link to the page explaining the password policy.

Initial login allowed

By default, a user is allowed to login after signing up. By disabling “Initial login allowed”, the user is allowed to sign-up but not allowed to login after signing up.

Tip

“Initial login allowed” can be used for additional security. The first email sent to an external user allows the user to sign-up and read the email. If the first email however is sent to the wrong recipient, the recipient might have access to the sensitve email. By disabling “Initial login allowed”, the recipient is allowed to sign-up but not allowed to login. The sender of the email should then use additional means to check whether the correct recipient has signed-up and then enable the login for the user by selecting “Login allowed” for the user account.

Server secret

The “Server secret” is used to protect external resources against tampering (using the HMAC algorithm). For example the sign-up link in the sign-up message is protected to make sure that a recipient cannot change the URL. A global server secret will be automatically generated the first time the server starts. The server secret is a required setting. In most setups there is no need to override the inherited server secret.

Client secret

The “Client secret” is used for generating one time passwords for a recipient. A “Client secret” is automatically generated if needed.

Webmail

Webmail enabled

If set (the default), the user is allowed to open the Webmail inbox. If not set, the user is allowed to login into the portal (assuming that “Login allowed” is set) but is not allowed to open the Inbox.

This setting is used if you only want to use Webmail Messenger for PDF encryption.

Read receipt

If set, a read receipt will be sent when the user opens the email for the first time.

Rewrite reply sender

By default, a reply from a Webmail user is sent with the envelope sender and from address set to the real email address of the user.

If “Rewrite reply sender” is set, the envelope sender is changed to the email address configured under “Reply sender address” and the from header is rewritten to:

"in name of [email protected]" <reply-sender-address@ciphermail.com>

where test@example.com is the original sender address and reply-sender-address@ciphermail.com is the address configured under “Reply sender address”.

Tip

“Rewrite reply sender” should be used if the SMTP server which receives the reply emails, i.e., the SMTP server defined in “Webmail relay host”, contains anti-spoof or anti-spam checks (for example SPF or DKIM checks).

Reply sender address

The sender to use for a Webmail reply email if “Rewrite reply sender” is enabled.

Send new mail notification

If “Send new mail notification” is set (the default), a “new mail” notification email will be sent to the user if a new mail is available. If “Send new mail notification” is not set, a notification email will not be sent.

Tip

“Send new mail notification” can be disabled if the recipient wants to keep it “secret” that the recipient has a Webmail Messenger account. If “Send new mail notification” is disabled, the recipient however needs to periodically login to check whether there are new emails.

PDF

Reply allowed

If set, a reply button will be added to the encrypted PDF.

Note

A reply button will only be added if “Reply URL” is configured.

Send CC to replier

If enabled, a Cc of the PDF reply will be sent to the replying user.

Note

Make sure that the Cc is encrypted. One way of doing this is by making sure the reply email is handled by the gateway and that the gateway is configured to encrypt the reply.

Reply sender

The sender to use for a PDF reply email if “Use reply sender” is enabled.

Use reply sender

If “Use reply sender” is set, the envelope sender of the PDF reply is set to the email address configured under “Reply sender” and the from header is rewritten to:

"in name of [email protected]" <reply-sender@ciphermail.com>

where test@example.com is the original sender address and reply-sender@ciphermail.com is the address configured under “Reply sender”.

If “Use reply sender” is not set, the PDF reply email is sent with the envelope sender and from address set to the real email address of the replying user.

Tip

“Use reply sender” should be used if the SMTP server which receives the reply emails contains anti-spoof or anti-spam checks (for example SPF or DKIM checks).

Password length

The number of random bytes used for the generation of passwords for PDF encryption.

Note

A password for an encrypted PDF should contain enough randomness to make it secure against brute force attacks. The “Generated length” defines the number of random bytes used for generating the password. A new password will be generated by creating random bytes. the random bytes are then base32 encoded to make it a readable password.

Reply validity interval

By default a reply link embedded in the encrypted PDF will never expire. By setting the “Reply validity interval”, the expiration time (in minutes) of the embedded reply link can be configured. If a user tries to reply using an expired reply link, the user gets a warning that the reply link has expired.

Reply URL

A recipient can securely reply to the PDF by clicking the embedded reply link from the encrypted PDF. The reply link opens the reply page of the built-in portal. The reply URL should be setup to link to the external URL of the PDF reply page.

The default reply URL is based on the portal “Base URL”. It is therefore advised to change the “Base URL” of the portal and not change the “Reply URL” unless there is a good reason to change it.

Deep scan

If enabled, the complete email is scanned for attachments. This is a way to work around a non-standard MIME encoding for email generated by Apple Mail.

Add cover page

If enabled, a PDF cover page will be added to the start of the encrypted PDF. This can for example be used to add a cover page with a company logo.

Cover page

The PDF cover page to add. The cover page should be a valid PDF with a maximum size of 64K.

Auto rename attachments

Email attachments are added to the encrypted PDF. Some file extensions are however blocked by some PDF readers (for example Adobe Acrobat blocks access to attached zip files). The PDF encryption module can automatically rename attachment extensions so the PDF reader will not block access to the attachment. The renamed attachment should then renamed back to the correct filename.

If “Auto rename attachments”, files that match a rule from from the “Attachments to rename” list will be renamed by appending the keyword “Keyword to add to renamed attachments”.

Example

If a message is PDF encrypted and a zip file with name document.zip was attached to the message, the zip file will be renamed to document.zip.RENAMED.

Attachments to rename

The list of filenames to rename. Multiple entries should be separated by a white space. Wildcard filename are supported.

Example

*.zip some-file.txt *.exe

Keyword to add to renamed attachments

The keyword to add to the extension of a filename if the attachment is renamed.

Reply Max. attachment size

The maximum allowed size (in bytes) of an uploaded attachment on the PDF reply.

Reply Max. number of attachments

The maximum allowed number of attachments which can be added to the PDF reply.

Attach original message as RFC822 (.eml)

If enabled, the original email will be attached to the PDF as an eml file (RFC822). The recipient can extract the eml file from the PDF and open it in the local mail application (for example Outlook). Because the original email is attached, all original message content, like any HTML content will be intact. The recipient can import the original email in unencrypted form in their email client for long term storage.

Background color

This defines the background color of the PDF. This can be used to match the background color of the PDF with the color of the cover page.

SMS

Phone number

The phone number of the recipient for sending SMS Text messages. SMS Text messages are used for 2-factor authentication.

Other

Server mode

Webmail Messenger can operate in two modes: “Addon mode” or “Stand Alone mode”. In “Addon mode”, Webmail Messenger is used as an add-on to the CipherMail gateway. The CiperMail gateway decides whether an email should be delivered to Webmail Messenger. The gateway sends the email embedded into a digitally signed and encrypted control email to Webmail Messenger. In “Stand alone” mode, Webmail Messenger will create an inbox and invite the recipient for every email it receives. In “Stand alone mode” it’s up to the sender to decide whether an email should be delivered via Webmail Messenger or not.

Signup URL

The URL for the sign-up page. The default “Signup URL” is based on the portal “Base URL”. It is therefore advised to change the “Base URL” of the portal and not change the “Signup URL” unless there is a good reason to change it.

Password reset URL

The URL for the password reset page. The default “Password reset URL” is based on the portal “Base URL”. It is therefore advised to change the “Base URL” of the portal and not change the “Password reset URL” unless there is a good reason to change it.

Webmail login URL

The URL for the Webmail login page. The default “Webmail login URL” is based on the portal “Base URL”. It is therefore advised to change the “Base URL” of the portal and not change the “Webmail login URL” unless there is a good reason to change it.

Password reset enabled

If set, the user is allowed to start the password reset procedure.

Tip

A password reset option makes the system less secure. If an attacker has access to the users mailbox, the attacker can start the password reset procedure and reset the password. It is therefore advised to always use 2-factor authentication. If 2-factor authentication is enabled, an attacker cannot login without the second factor. Alternatively if 2-factor authentication cannot be enabled, you might consider disabling the password reset option. If the password reset option is disabled and a user no longer knows the password, the user should contact support to manually reset the password.

System mail secret

The “System mail secret” is used for adding unique headers to emails generated by Webmail Messenger. A global “System mail secret” will be automatically generated the first time the server starts. Unless there is a good reason to change the “System mail Secret”, it’s best to keep the generated value.

Post processing

Header external

This header will be added to any email that has been handled by Webmail Messenger.

The header should be specified as:

HEADER[:VALUE]

Where HEADER is the name of the header and VALUE is the optional value.

Custom properties

The custom fields 1,2 and 3 can be used by extensions of Webmail Messenger.

Quota

The maximum size of an individual mailbox is determined by the quota for that user. The user quota can be set on the “User quota” page.

User quota

The maximum size of a user inbox (in bytes)

Portal authentication settings

On the “Portal authentication settings” page, 2-factor (2FA) authentication can be enabled for a user.

Webmail Messenger uses Time-based One-Time Password algorithm (TOTP) for two factor authentication. The TOTP algorithm generates a unique, time based, one time password every time the user tries to login. The one time password can be sent to the user by SMS Text or it can be generated by a TOTP device like for example Google Authenticator (Android, IOS) or FreeOTP (Android)

Note

A one time password is only valid for a certain time period. If a TOTP device is used, it’s important that the system clock of Webmail Messenger is accurate.

2FA secret key

The “2FA secret key” is the user secret which is used by the TOTP algorithm to generate a unique one time password for a user. The “2FA secret key” should be in Base32 format.

The “2FA secret key” is automatically generated by the gateway when needed and in most cases there is no need to manually set or change it. If an external TOTP device is used which already contains a (fixed) secret, you can copy the secret value from the TOTP device to the “2FA secret key” field for the user.

If a user uses a TOTP device on a mobile device (Android, iPhone, iPad), the secret key can be imported using a QR-code from the user portal.

2FA secret key issuer

An TOTP device can be used for multiple accounts. The user of the TOTP device needs to know which secret belongs to which account. If a QR-code is used for importing the 2FA secret key, the imported key will be stored under the configured “2FA secret key issuer” name.

Authentication mode

The “Authentication mode” defines whether two factor authentication is enabled for a user. “Authentication mode” supports the following modes: Password, SMS or TOTP.

Password

With password mode, two factory authentication is not enabled and the user can sign-up and login with username/password. Password mode is the default mode.

SMS

With SMS mode, an SMS Text with the one time password is sent to the user. The user has to provide the one time password on the login and sign-up page.

Note

SMS mode will only be enabled if the following requirements are met:
  1. “SMS authentication enabled” is set.

  2. The “Phone number” is set for the user.

  3. The “2FA secret key” is set for the user.

  4. SMS gateway is configured.

If the above requirements are not met, the user is allowed to login with username/password, i.e., two factor authentication with SMS is not enabled for the user.

TOTP

With TOTP mode, the user can needs to provide the one time password generated by the TOTP device when logging in.

Note

TOTP mode will only be enabled if the following requirements are met:
  1. The “2FA secret key” is set for the user.

SMS authentication enabled

SMS Authentication mode is only enabled if “SMS authentication enabled” is set. “SMS authentication enabled” can be unselected if the user should not be allowed to set the authentication mode to SMS (using the portal authentication wizard).

Password mode allowed

If set, the user can select “Password mode” using the portal authentication wizard.

Note

By disabling “Password mode allowed”, you can force the user to always require two-factor authentication.

User override allowed

If set, the user is allowed to change the “Authentication mode” using the portal authentication wizard.

Signup SMS optional

If set, the user can choose whether to provide a phone number for two-factor authentication via SMS on the sign-up page. If not set and two-factor authentication with SMS is correctly setup, the user is required to provide a phone number during sign-up.

Webmail settings

Max attachment size

The maximum size of an attachment (in bytes) a user is allowed to add to a message.

Auto cleanup

Webmail Messenger can be configured to automatically delete emails and accounts which are older than a certain period. This makes managing Webmail Messenger easier because it makes it less likely that the system runs out of disk space.

Tip

It is advised to enable auto cleanup. Auto cleanup makes it less likely that the appliance runs out of space and increases security because sensitive emails are automatically deleted after a defined period.

Auto mailbox cleanup

The auto mailbox cleanup service can be configured to automatically delete emails which are older than a certain period.

Auto cleanup enabled

If set, auto cleanup of email will be enabled.

Cleanup interval

“Cleanup interval” defines when email will be deleted.

Example cleanup intervals:

8h

Delete mail older than 8 hours

1d

Delete mail older than one day

2w

Delete mail older than two weeks

Auto account cleanup

The auto account cleanup service can be configured to automatically delete user accounts which are older than a certain period.

Auto cleanup enabled

If set, auto cleanup of user accounts will be enabled.

DKIM

System key

The DKIM system key is used for DKIM signing of locally generated email. With the DKIM header, the gateway can detect that forwarded email was generated by the gateway and therefore requires no further processing. This key is automatically generated.

Licensing

Auto assign license

If enabled, a license will will automatically be assigned to the sender. Only licensed senders are allowed to use encryption.

Note

“Auto assign license” is only relevant if the license is for limited users. An unlimited user license will not count senders.